The process will involve two main steps: configuration webpage set up and connecting to the Belden Horizon™️ Console.
The set up will take approximately 20 to 30 minutes.
First, we will start with the configuration webpage to set up your gateway.
- Insert the SIM card on the front of the gateway.
- Connect the gateway to the Windows PC via local area network (LAN) port with an Ethernet cable.
- Apply power to the gateway.
- If your PC is on a different subnet, temporarily set the IP address of your PC to 192.168.0.xxx with a subnet of 255.255.255.0.
- Open a web browser and enter the ICX35-HWC default homepage address: http://192.168.0.250
- Once the ICX35-HWC homepage opens, enter the default username and password to log in.
- Default username: admin
- Default password: password
Note: Once you are logged in, you will be prompted to change the password. Please follow the password requirements: Between 8-40 characters possessing 3 of the 4 attributes below.
i. Uppercase character
ii. Lowercase character
iii. Symbol
iv. Number
Please have the following materials ready before you begin:
- ICX35-HWC gateway
- PC with Windows 10 or 11 at 32bit or 64bit
- Power supply (10V-30V DC)
- Antenna
- SIM card (size 2FF, mini-SIM)
- Ethernet cable
Need additional support?
Reach out to our Technical Support Team.
Get more product information.
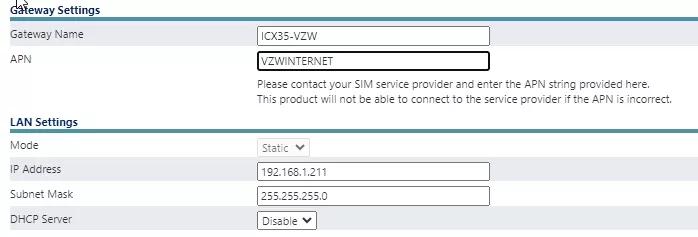
- Next, find your gateway settings and enter the access point name (APN) string from your SIM card cellular provider.
See Figure 1 .
- Depending on the cellular provider, there are two APNs that are commonly used:
- Verizon – VZWINTERNET
- AT&T – BROADBAND
Figure 1
Note: If you use a different carrier, or are having issues connecting the ProSoft ICX35-HW, please contact your cellular provider to verify the correct APN.
-
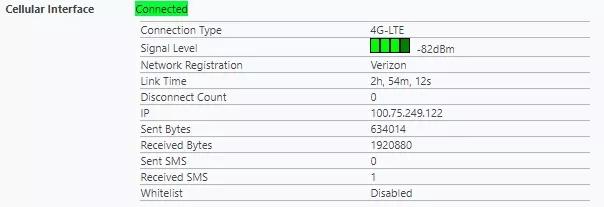
Once the gateway is connected to the SIM service provider, a green Connected indicator will appear at the top of your settings. If you do not see the Connected indicator, your device is not connected, and you need to reach out to your cellular provider for support.
See Figure 2 .
Figure 2
Now, let’s connect the ProSoft ICX35-HWC gateway to your Belden Horizon™ Console.
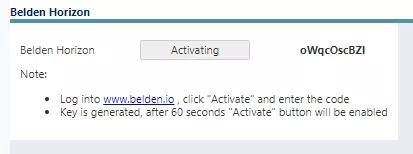
- Navigate to the Administrator tab on the configuration webpage and locate the Belden Horizon™ block at the bottom of the page.
See Figure 3 .
Figure 3

- Click on the Activate button and copy the key that appears to the right. This will be a string of characters and needs to be copied exactly.
See Figure 4 .
Figure 4
- Next, navigate to your Belden Horizon™ Console account. Log in and click on the Gateways menu on the left. Note: If you haven’t logged in to Belden Horizon ™ Console before, you will need to create an account.
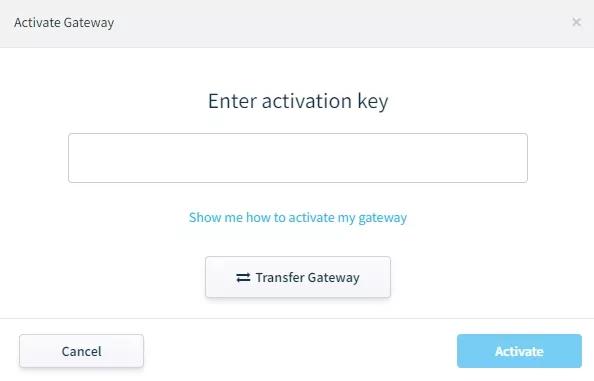
- Find the blue + Add Gateway button in the top right and enter the activation key when prompted. This is the activation key written down from step 2.
See Figure 5.
- Click on the blue Activate button on the right and the device will appear in your account.
Figure 5
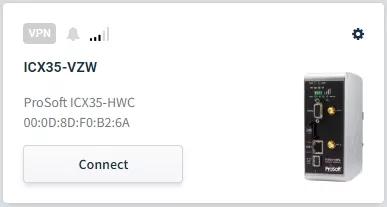
- You are now ready to connect your Belden Horizon™ Console to your gateway. Click the Connect button.
See Figure 6 .
Figure 6
- The first time you connect an IP window will appear. When the IP window appears enter your IP address below. This is the IP address your computer will be given when connecting the gateway to devices at the remote site. Once the correct information is entered, click the blue Save & Connect button.
See Figure 7 .
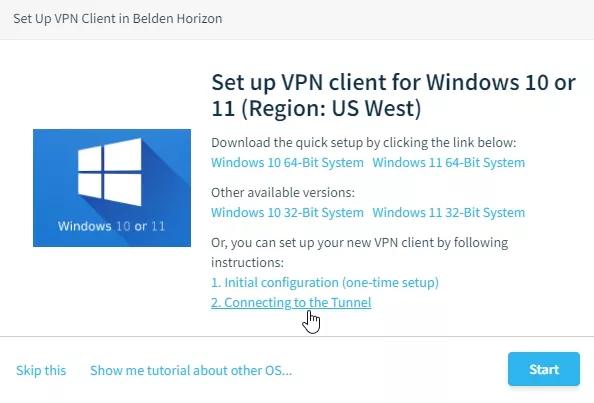
- Note: the first time you connect an ICX35-HWC to Belden Horizon™ Console, you will need to set up your PC and VPN connection. If you have already connected to the VPN, please move to step 8.
See Figure 8 .
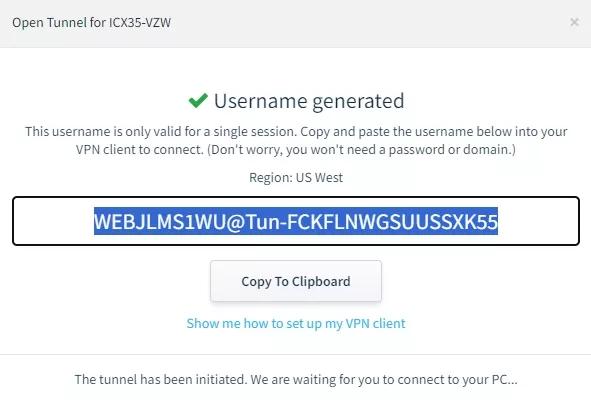
- When the username generated window appears, click Show me how to set up my VPN client appearing in blue.
-
Click on the link located under Download the quick set up by clicking the link below: When the second window appears, please choose the Windows version that you are currently using. When prompted, please start and install the application. This should only take a few seconds.
- Once it has downloaded, select Skip this on the bottom left to close the VPN window.
Figure 7
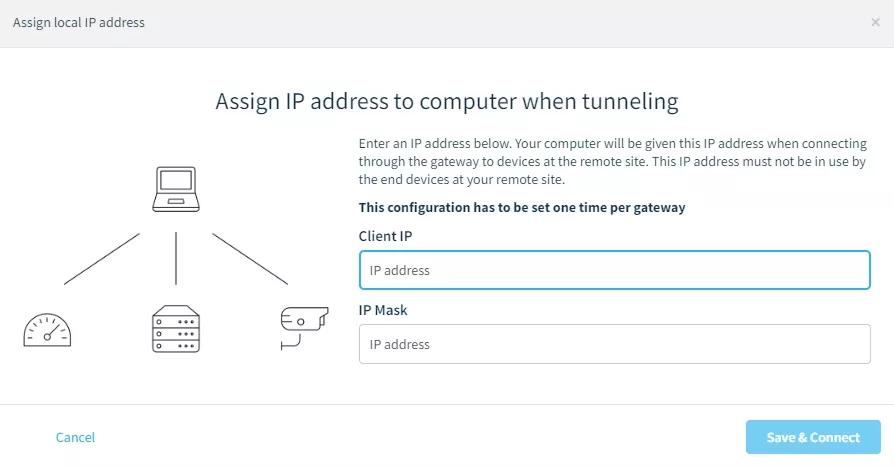
Figure 8
- Once the quick set up is installed, you are now ready to connect to the remote network. The username generated window will reappear. Click Copy to Clipboard under the string of text and numbers.
See Figure 9 .
Figure 9
- Navigate to the Network & Internet section on your computer settings and locate the VPN installed in step 7.
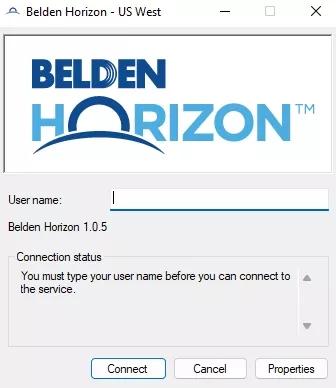
- Clear out anything in the User name field and paste the username that you copied.
See Figure 10 .
- Click the Connect button.
- Once the connection is complete, the window will close automatically, and your device card Connect button will turn blue as a final indication.
- You are now connected to your remote network and can access devices on that network.
Figure 10